 |
The stock exhaust manifolds. Functional, but not what I want. In taking these off, I discovered that one was cracked at a mounting bolt. |
 |
It's always a bit of a risk trying to find stock headers for custom applications. Fortunately, there are lots to choose from for Ford small blocks. There appeared to be a fair amount of room on both sides of the block so I decided to skip block hugger headers. Some internet reading also warned that block huggers might require changing to a mini-starter which was one more thing I didn't need to deal with. |
 |
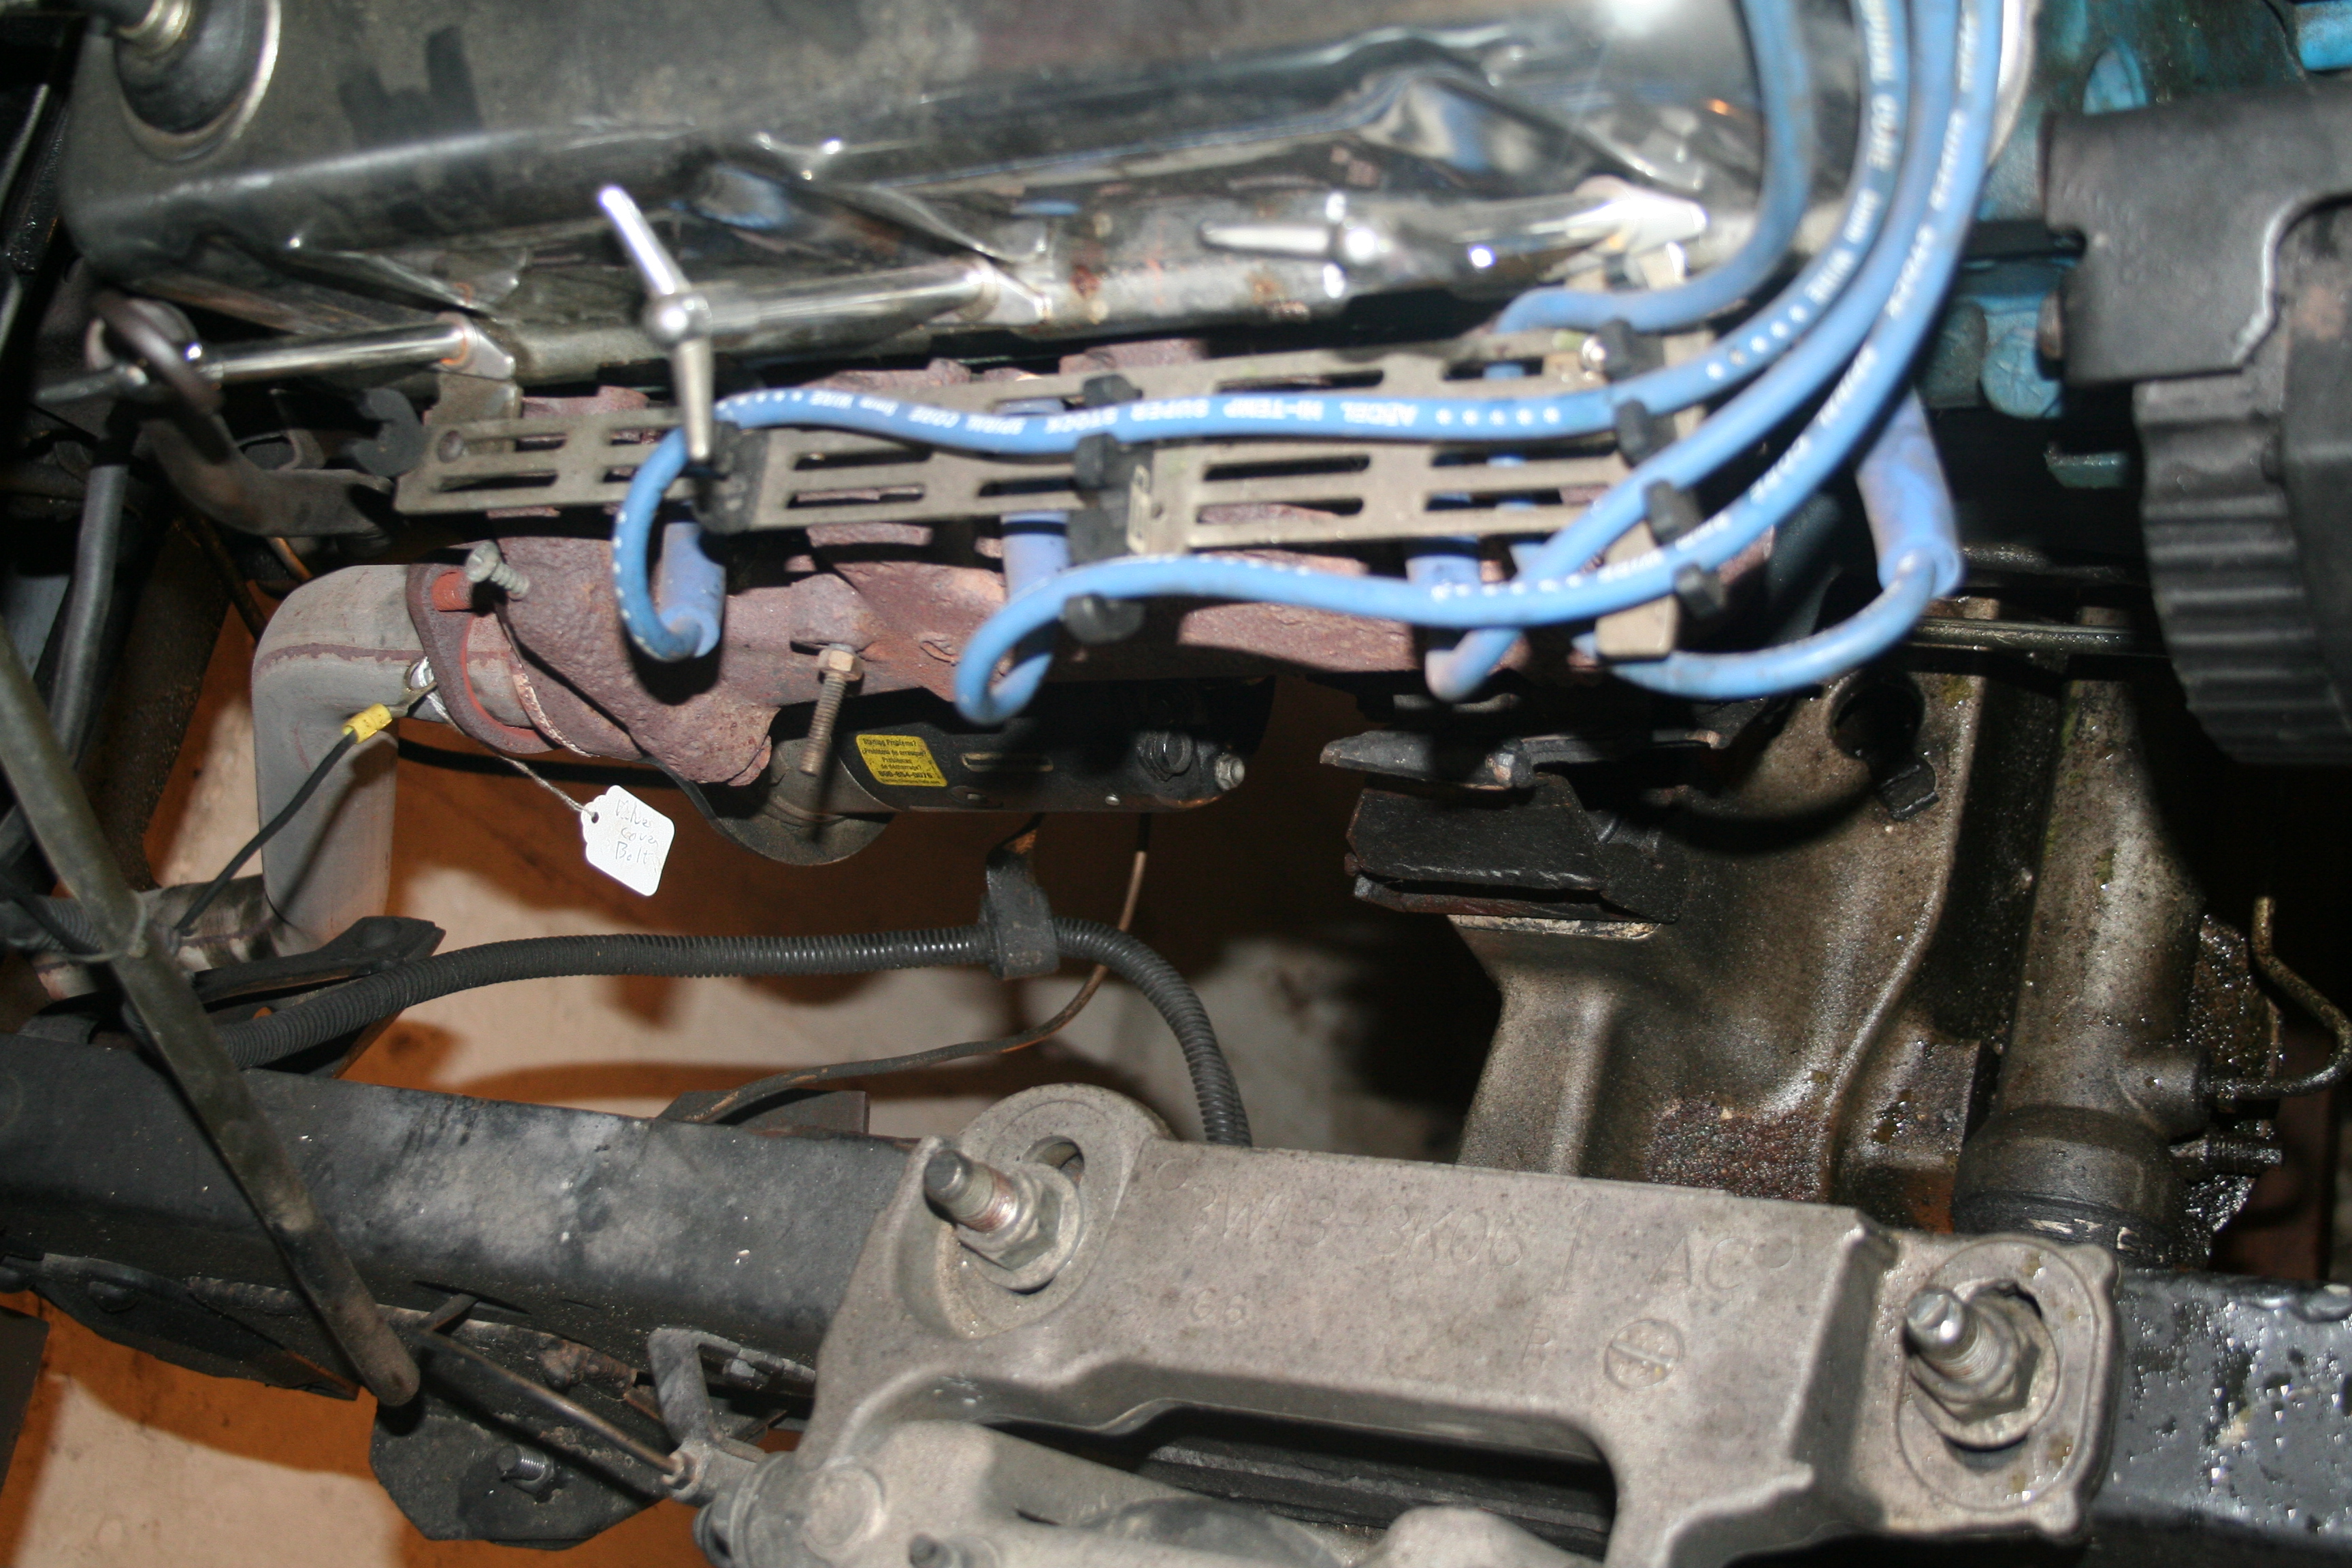
The only apparent fitment issue looked to be the steering shaft. |
 |
The passenger side had over 4" between the head (actually the stock exhaust manifold) and the frame - plenty of room for a "typical" set of headers. |
 |
The driver's side had only a little over an inch of clearance to the steering shaft. This weird looking shaft with knuckle is the stock Crown Vic steering shaft. I assume the knuckle is related to an adjustable column in the Crown Vic, or some such. But it adds the need for a bit of additional clearance as the shaft rotates around the knuckle. |
 |
After looking around I ended up buying a set of Flowmaster headers. They have a traditional long tube construction that I like the look of. |
 |
The passenger side header sits forward of the driver's side due to the head alignment. The engine mount and the header interfered with one another. As the engine mount was a Rube-Goldberg make-it-fit contraption, a little work cutting and re-welding it allowed the header to mount properly and actually improved the engine mount without changing its relative position. |
 |
Front view of the passenger side header and engine mount after reworking the mount. |
 |
A trial fit of the engine/headers into the engine bay showed some interference of the passenger side header with the engine mounting post on the Crown Vic crossmember. This is a pretty hefty cast piece, so I decided rather than trying to cut/weld/hammer/dent the header, it would be easier simply to make a small cut in the mounting post. |
 |
I didn't get any pictures of the process, but although the driver's side headers fit, they did prevent turning the steering because they were right up against the steering shaft. I thought about working up a new steering shaft geometry, but in the end decided it was easier to re-work the headers. They came out from the heads horizontally and dropped almost vertically with over 2" of clearance to the engine block. So I cut a wedge out of the bottom side of each header tube about an inch from the header flange and bent the tube/collector portion inward towards the block and re-welded the tubes. This swung the headers/collector in towards the block and bought me about an inch of clearance at the steering shaft. I could now rotate the steering shaft, but it did still touch one pipe at one point in the turn. |
 |
A small dent made with a ball-peen hammer in the header tube now lets the steering work freely. In the full rotation of the steering shaft, this is as close as it gets to the headers - about a quarter inch of clearance. Since this isn't a high torque engine I expect this to be adequate as the engine revs. I hit the weld area of the headers with some high-temp stainless steel paint - the heat has discolored this to a slight gold tint, but it is functional. |
 |
For those who have never used SketchUp before, it is a 3D drawing/capture
tool with basic capabilities available for free (you can upgrade to pro versions). I use this tool for almost
anything/everything I build - desks, gun boxes, back yard decks, gun range planning, turning target holders,
etc. It works great for visualizing and trialling design options.
I measured out and put together a quick model of the basic frame of the truck and included any objects that could interfere with the exhaust. The grey boxes on either side represent the running boards. The wire hoop is the parking brake cable. The tranny was roughed in, but the drive shaft was placed as accurately as I could measure. I included simply the end tip of the header where the exhaust would need to start. SketchUp is capable of a great deal more detail than this, but this was adequate for the task at hand. |
 |
I then build models of the muffler I planned to use, straight pipe, 90° and 45° bends. Since this is not a high performance rig, I didn't worry about trying to include an "X" pipe and went with separate exhausts for the two sides. I fit the muffler into the truck model and decided to have the exhaust exit just in front of the rear tires. I then played with the various pieces and got an exhaust system to fit. I did end up changing the muffler from one with an offset input to one with a centered input - this eliminated two bends in each exhaust. |
 |
Here's the completed plan for the exhaust. This now tells me what I need to buy - six 45° bends, a pair of 60° bends (150° or 180° universal bends), and about 8' of straight pipe. |
 |
Jeg's, Summit, and Ebay sourced the various parts for the exhaust system. This is all 2½" OD aluminized pipe. It was cheaper to buy a kit with the mandrel bends than to source the pieces independently, so I ended up with a few extra bends. |
 |
I went with Thrush welded and aluminized turbo mufflers with a centered inlet and offset output. |
 |
Based on the model I built in SketchUp I hung the muffler on the driver's side first since it had to deal with the parking brake cable. |
 |
Here's the gap to span - from the collector to the muffler input. These are pretty close to in-line side-to-side and are offset about 4" vertically. |
 |
None of the pipe or mandrel bends I bought came with expanded ends, so I had to do the expansion myself. |
 |
While Harbor Freight and a number of other places source relatively inexpensive exhaust expansion
tools, most of them had very poor customer reviews. Most broke after one or two uses. I ran
across the Lisle 34400 Exhaust Pipe Stretcher that had great reviews. List price was $150,
but I found it on Amazon for around $75. The base tool only covers pipes between 1⅝" and
2⅞", but extender assemblies are available for larger pipe - I picked up the extender for
2⅜" to 2¾". This tool is impact wrench capable and has roller bearings and a bearing
race (the thick black body in the picture) that keep it running smoothly - don't forget to
grease the bearings and threads before use.
The only hitch I had with this tool is that the drive bolt is 28mm - which was not in my tool suite. None of the hardware stores in my area had an impact socket in this size, so another Amazon purchase put me in business. |
 |
The Lisle 34400 worked perfectly, easily, and quickly. If you're working exhaust systems, I highly recommend this tool. |
 |
I put an upward 45° bend right off the collector. |
 |
Measuring, cutting, and fitting a second 45° bend made a 4" offset in the exhaust that pretty well aligns with the input to the muffler. |
 |
A 22" piece of straight pipe filled the gap. These were tack welded in place then the assembly was removed from the truck, fully welded, and re-installed on the truck. |
 |
I wanted the exhaust to exit the side of the truck right in front of the rear wheels. A little playing, trial fitting, and mucking around changed the design from what was captured in the SketchUp model - I was able to go with a 90° bend coming out of the muffler rather than having to cut a 60° piece out of a "U" bend - easier to piece together and gave me essentially the same angled exit I wanted. |
 |
Here's the fully welded driver's side exhaust ready to hang permanently on the truck. |
 |
I welded on chrome tips to the end. I had to expand the last section of straight pipe to fit the inside of the tips. I don't think these were intended for weld-on applications as they came with two "screw holes" that I suppose were meant to provide screw-clamp attachment to the exhaust. I welded them on anyway. |
 |
Here's the back end of the driver's side exhaust. |
 |
I'm not sure this hanger was necessary, but I added it to give a bit of support to the end of the tail pipe - and hopefully keep it from rattling against the running board. |
 |
The passenger side was tighter to the drive shaft but did not have the parking brake cable to worry about. It was essentially a mirror of the driver's side. |
 |
A picture of the passenger side exhaust fully installed. |
 |
The completed dual exhaust. |