Setting Your Magic Number for the GSC
![]()
| Step 1 - Setup | ||||||||
|---|---|---|---|---|---|---|---|---|
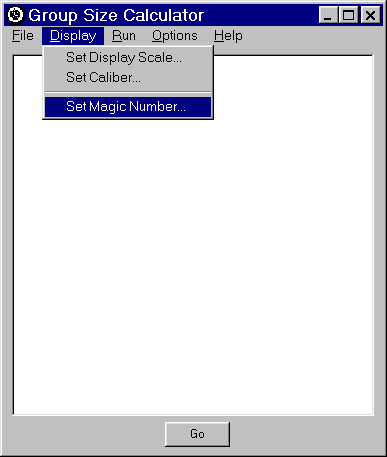 |
Select the "Set Magic Number" menu item (under the "Display" sub-menu). | |||||||
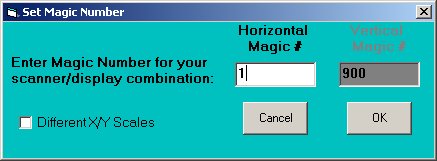 |
Temporarily set your magic number to "1". Click "ok". Note: GSC V2.1 now adds the ability to separately set Magic Numbers for the horizontal and vertical directions. For this step, one can unclick the box that says "Different X/Y Scales" - this will set both Horizontal and Vertical Magic Numbers to "1". | |||||||
| Step 2 - Scan Reference Images | ||||||||
|
||||||||
| Step 3 - Sanity Check of System | ||||||||
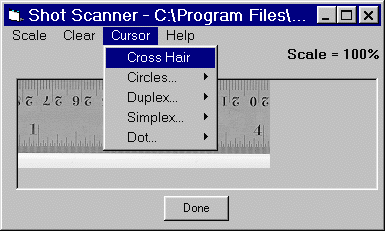 |
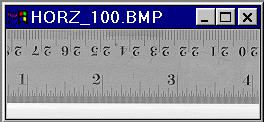
On the "File" menu item, select "Open..." and move to the folder containing your images of the ruler. Open the 100% scale horizontal rule. The "Shot Scanner" window will pop up with the image showing. You can re-size the window by clicking and dragging any edge/corner if desired. On the "Cursor" menu select "Cross Hair" (this is the easiest to use for calibration). Make sure the "Scale" reads "100%". | |||||||
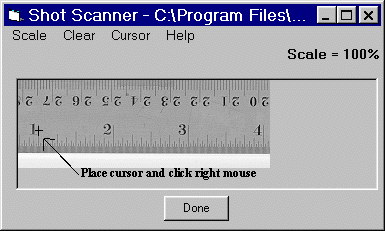 |
Move the cursor over an inch mark (the "1" inch mark is used for an example in the image shown here) and click the right mouse button. Be as accurate as you can. This sets the "0" mark for the next measurement. | |||||||
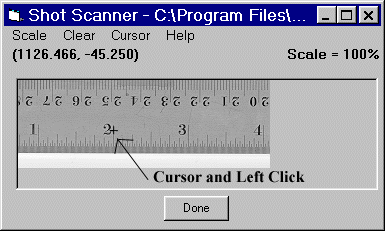 |
As accurately as possible (in the horizontal direction, we don't care about the vertical direction yet) move the cursor over 1" (to the 2" mark in this example). Click with the left mouse button. An ordered pair will now show up in the upper left corner ("(1126.466, -45.250)" in this example. The first number of the pair shows the distance in the "X" direction (1126.466 in this example), and the second (-45.250) shows the distance in the "Y" direction. If you've measured one inch on the ruler, the first number is real close to your magic number. Make a note of this value. It doesn't matter if the number is positive or negative, only the absolute value is relevant at this time - the "+" or "-" is only an indication of whether the point you measured is to the left or right of the "0" mark you set down. (go ahead and click "done" on this window). | |||||||
 |
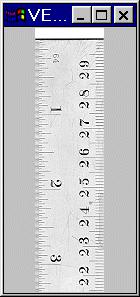
Now do the same but using the image of the vertical ruler at 100%. Open the file, make sure the cursor is the cross hair, the scale is at 100%, right click on an inch mark to set the "0" reference point, and left click on an inch mark 1" away from the "0" mark you set. This time the right hand number of the ordered pair (-1128.409 in this case) is the one of interest. Again, it doesn't matter if the number is positive or negative as it's only the absolute value that's of interest. If you've been accurate in your "clicking", this number should be fairly close to the number you saw in the horizontal measurement - within 2 or 3 "units". This tells us that the vertical scaling and horizontal scaling on the scanner/monitor are uniform. If the number you get is significantly off, repeat the exercise to make sure it wasn't simply a "pilot error". If you continue to get significantly different numbers, there is some "problem" with your scanner / monitor configuration. You'll need to track that down prior to continuing and prior to getting accurate readings from this program. (go ahead and click on "done" on this window). | |||||||
| Step 4 - Determining the Magic Number | ||||||||
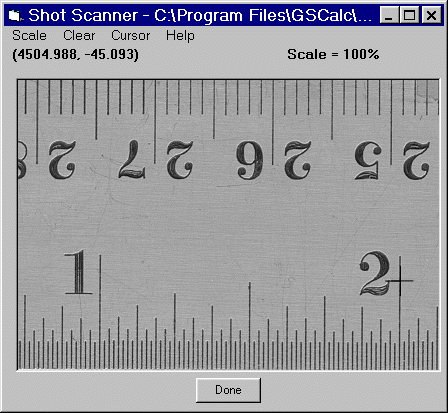 |
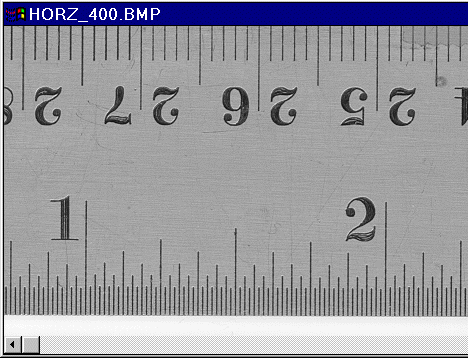
On the "File" menu item, select "Open..." and open the 400% scale horizontal rule. The "Shot Scanner" window will pop up with the image showing. Re-size the window if desired. Reselect the "Cross Hair" cursor if it is not already set. Even though this image was scanned at 400%, keep the scale set to 100%. This will give us a number 4 times larger than the Magic Number, but we'll divide by 4 in the end. As accurately as possible,place the cursor on an inch mark and click with the right mouse button - again, this sets the "0". Move the mouse to the next inch mark on the ruler and as accurately as possible, click the left mouse button. Write down the first number of the ordered pair (the "X" value - "4504.988" in this example). Now divide this by 4 (400% scaling) - for the example shown, this gives us a horizontal Magic Number of 1126.25. Close this window by clicking "done". | |||||||
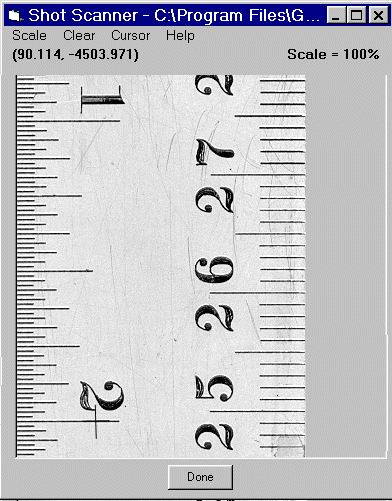 |
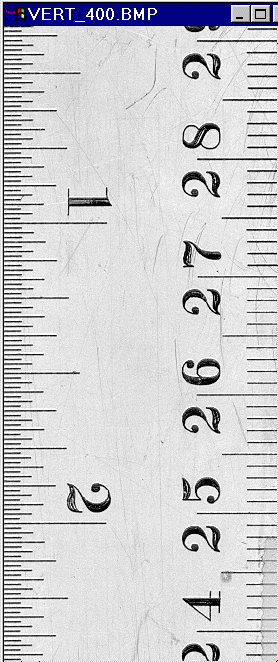
On the "File" menu item, select "Open..." and open the 400% scale vertical rule. The "Shot Scanner" window will pop up with the image showing. Re-size the window if desired. Reselect the "Cross Hair" cursor if it is not already set. Again, keep the scale set to 100%. As accurately as possible, place the cursor on an inch mark and click with the right mouse button setting the "0". Move the mouse to the next inch mark on the ruler and as accurately as possible, click the left mouse button. The second number of the ordered pair (the "Y" value - "-4503.971" in this example) is the one of interest. Again divide this number by 4 (400% scaling) to get a Vertical Magic Number of 1125.99 (only the absolute value is important, so we can ignore the negative sign). Close this window by clicking "done". | |||||||
| Step 5 - Setting the Magic Number | ||||||||
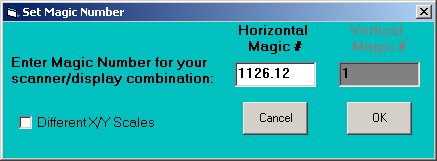 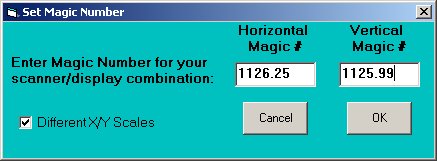 |
Return to the "Set magic number" menu item (again under the "Display" sub-menu).
If the number found for the horizontal measurement is very close to that
found for the vertical measurement, one can stick with a single Magic Number that is an
average of the two numbers (shown in the upper figure at left). If, however, there is a difference between these two
numbers, you may wish to click the "Different X/Y Scales" and enter separate
horizontal and vertical Magic Numbers.
Enter the "magic number(s)" and click "ok". The program will remember these numbers from here on out, so you only have to do this once - eg. when you close and restart the program your magic number(s) will be remembered. |
|||||||
| Step 6 - Final Sanity Check | ||||||||
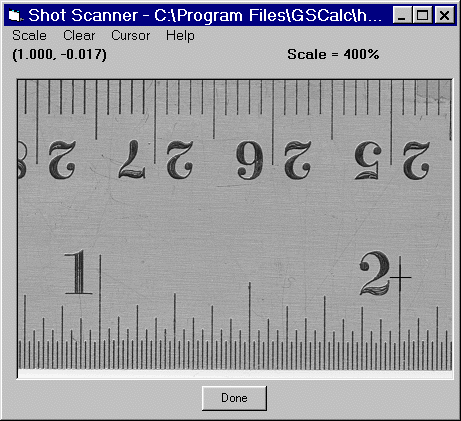 |
As a final sanity check re-open one or more of the ruler images above. This time
set the scale appropriately (100% for 100% and 400% for 400%). Right
click to set the "0" and left click one inch away. If everything has been done
correctly you should see the appropriate number of the "X-Y" pair ("X" in the example)
show 1.000 +/- 0.001 inches. |
|||||||
